At dinner last Friday with my sister-in-law Lisa, she pointed at the arugula garnish on her salad and asked how to grow microgreens at home. Broccoli and radish germinate in 1 to 2 days and are ready to cut in 5 to 7 days. A glass jar, an inch of seedling mix, and a windowsill with 8 to 10 hours of light is all the setup you need.
Lisa is not a gardener. That was the point. Microgreens are one of the few crops where a beginner can go from seed to harvest inside a week without a garden, a grow tent, or any prior experience. My niece Alia grew her first batch of broccoli microgreens the Saturday after that dinner. She harvested them the following Friday.
At jPure Farms, we grew at a commercial scale, but the home principles are identical. Get the germination conditions right, give them enough light after sprouting, and do not overwater. Most failed batches come down to one of those three.
This post walks through variety selection, container and soil setup, planting, lighting, harvesting, and the problems that kill most first batches before they reach the plate.
Key Takeaways
Broccoli and radish microgreens germinate in 1 to 2 days at 72 to 75°F and are ready to harvest at 2 to 4 inches tall, typically 5 to 7 days after sowing. They need 8 to 10 hours of light daily after sprouting. A glass jar or food-safe container with 1 to 2 inches of seedling mix is sufficient for a home setup.
Ready To Find Out?
9 questions. You'll know exactly where your space, seeds, and routine stand
before you waste a single tray. Most growers skip this and learn the hard way.
Which Microgreens Are Best for Growing at Home?
So, the next day, Saturday, I headed over to Lisa’s. I rang the doorbell and Alia my niece opened the door. “I want to learn how to grow microgreens!”, she said.
Growing microgreens are great for new gardeners, even for gardeners looking for new crops. “Okay, let’s get to it,” I said.
The first thing we want to do is choose the variety of microgreens to grow. I wanted seeds that were big enough to make sowing them easy and would sprout fast, in one to two days. They needed to be flavorful, crunchy and we could cut and eat them in time for dinner next Friday.
Only two varieties fit the bill: radish and broccoli microgreens. We chose broccoli, but Alia wanted to grow the arugula microgreens she had the night before. You won’t find arugula on anybody’s list of easiest to grow microgreens. They take about 5 days to germinate and another 5-7 days to harvest. But, they’re great with salads, scrambled eggs, and burgers and sandwiches!
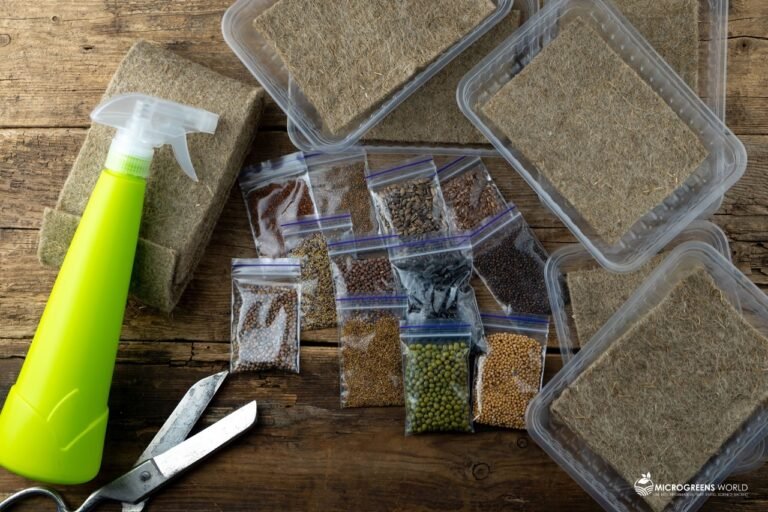
Growing microgreens that are healthy and yummy starts with the best seeds. Try to purchase your seeds in small quantities, enough to last 3-4 months. I keep my leftover seeds in a glass jar in a dark cupboard. You might consider the crisper tray in the fridge if you have space.
Most varieties of organically grown seeds are available via mail order or upscale grocery stores in your area.
Many seed companies carry microgreen seeds in their catalogs.
If you can’t find organic, at least look for non-GMO kind. Buy from a reputable company, one with the Certified Naturally Grown label.
If you buy broccoli, don’t spend money buying cauliflower or kale or cabbage.
They are from the same family, Brassicaceae, and near-identical as microgreens.
Of course, I brought along packets of seeds.

What Containers and Soil Do You Need for Microgreens?
Should I use soil or hydroponics? That’s a big word, isn’t it? So, here’s the Wikipedia definition:
Hydroponics is a method of growing plants without soil by using mineral nutrient solutions in a water solvent.
Roberto Lopez over at Porch, “the people who make improving your home simple,” has a great article, How to Create Your Hydroponic Garden: Tips from the Experts, where I and others show you how to start your hydropic garden.
As Roberto states, “The size of a hydroponic system can range from a single pot up to a string of greenhouses used in commercial agriculture. Combined vertical planting techniques and hydroponics can reduce the amount of space needed by as much as 99%. One of the reasons for this is that in a hydroponic system, the plant roots do not need to spread out to find food because the system surrounds them in the water they grow. This allows for the cultivation of more plants in a given area.”
I started experimenting with clear plastic salad-mix boxes, milk jugs cut in half, and even a cake tray. Now, I use either glass jars or food-safe, biodegradable plastic salad boxes to grow microgreens.
While some home gardeners have developed elaborate urban growing systems such as hydroponics, you can repurpose plastic food containers.
Microgreens will grow in any container you can find around the house.
Now that Alia and I have our nice glass jar selected, it’s time for the soil. We jump in her Mini and head to the hardware store down the street.
Potting soil or seedling mix works well for microgreens. But you want soil that is easy to wet, that doesn’t hold too much water, and can give results a little faster.
We go with a starter mix. Don’t add any fertilizer as it encourages rot!
How Do You Plant and Grow Microgreens Step by Step?
Get your glass jar or plastic container and fill it with soil. Add about one to two inches of that clean, seedling mix. Make sure you pack the soil loosely. Lightly water the soil.
One of the main issues with growing microgreens is getting enough seed. To get enough microgreens you will need to spread it across the soil. To give you an idea how much seed to start with: 1/4 to 1/2 cup for a 4” X 4” space is a lot. For smaller seeds, like the broccoli and arugula, you want 1/4-inch spaces between seeds.
Sprinkle your microgreens seeds as evenly as you can without letting any of them overlap. Barely cover the seeds with more soil—just enough to hold moisture. Mist your seeds and soil with your spray bottle until the soil surface is damp. This will nuzzle the seeds into the soil.
Next, cover the jar with a plastic lid. In early germination, your microgreens seeds don’t need any light. Keep the trays in a warm place (between 72-75 degrees). This maintains humidity, moisture, and consistent temperature.
Check on the jar daily. Mist as needed, to keep the seeds moist. Many people make the mistake of over-watering seedlings. Be sure the soil is damp, not too dry or wet.
Once your microgreens seeds sprout (about 1-2 days), put the jar on your windowsill (or turn on the disco light). They’ll need about 8-10 hours of light a day. Leave them uncovered. They wilt in humidity as I learned.
How Much Light, Water, and Warmth Do Microgreens Need?

When they emerge, the first leaf or the pair of leaves to show are the cotyledons, which can look very different from the leaves that follow, called “true” leaves.
The developing chlorophyll is what transforms palatable broccoli sprouts into tasty broccoli microgreens.
Seek at least ten hours of light.
While direct sunlight fosters the most succulent growth, indirect sunlight can suffice.
Use artificial lighting as a supplement, maybe in winter when sunlight is shorter and weaker.
Rotate the trays every few days so that all the seedlings get equal exposure to sunlight. Move the jar from window to window if you need to follow the sunlight.
And, just as you need at least six hours of sleep, plants need a minimum of six hours of darkness.
Water them once a day and watch them grow and change color. Use the spray bottle to keep the soil moist, not soggy.
Plants, including microgreens, need air to grow. And just like plants the young microgreens will oxygenate and clean the surrounding air. Open your window or put your jar when it can get some fresh air one or two times per day.
During cold winter days with fewer daylight hours, broccoli can take up to 10 days to grow—double the five days in summer!
You can encourage germination by using a seedling heating mat or a heated cabinet.
Alia and I place the jars under our grow lights to warm up the soil before sowing.

When and How Do You Harvest Microgreens?
Three to four days after sprouting, the microgreens will be 2-4″ tall and ready to harvest. Don’t let them get much taller than that, or they’ll lose their sweetness.
Harvest with clean scissors or shears. Cut the stems just above the soil line.
Rinse in a small salad spinner, serve, and eat. Add to salads, sandwiches, and wraps, or snack on them plain. Yum!
Store dry microgreens in the refrigerator in a sealed container.
Once you harvest the microgreens, compost the soil and roots as they will not regrow. To make a new batch, wash the jar, use clean seedling mix, seeds, and start again.
Avoiding Common Problems

Alia and I learned some things about growing microgreens that first week. Here are some suggestions to observe:
- When sowing, make sure each seed is in contact with the soil surface (otherwise they will not germinate).
- Too much water will cause the roots to rot and fungus growth.
- Always buy seeds from a reputable company to guard against soil-borne contamination from pathogens such as E. coli.
- Rinse seeds to be safe.
- If you have a garden sieve, use it to remove any debris from the soil.
- Check the soil you buy. Avoid microbes, bacteria, fungi and other harmful soil additives that can cause mold to grow.
- Use an organic seedling mix. You need soil that will stay moist but not soggy.
And just as important, like any raw vegetable (even greens labeled “triple-washed”), rinse your microgreens before eating.
Growing Microgreens At Home: Frequently Asked Questions
What is the easiest microgreen to grow at home for beginners?
Radish and broccoli are the two most reliable varieties for beginners. Radish germinates in 1 to 2 days and is ready to harvest in 5 to 7 days. Broccoli follows a similar timeline. Both are forgiving with light variation and grow well in a standard glass jar or food-safe container on a windowsill. Arugula takes longer — around 10 to 12 days — and is better suited to a second or third batch.
How much light do microgreens need when growing at home?
After sprouting, microgreens need 8 to 10 hours of light per day. Direct sunlight produces the most compact, flavorful growth. Indirect light works but may result in slightly leggy stems. A north-facing window with 6 hours of natural light can be supplemented with a basic grow light. Rotate the container every few days so all seedlings get even exposure.
What is the best soil for growing microgreens in containers?
A seedling starter mix is better than regular potting soil for home container growing. You want a mix that stays moist without becoming waterlogged. Fill the container with 1 to 2 inches of seedling mix, packed loosely. Do not add fertilizer — it promotes rot rather than growth. Avoid soil with added moisture-retention beads, which hold too much water for microgreen root depth.
How often should you water microgreens at home?
Once a day with a spray bottle is usually enough. The goal is damp soil, not wet. Overwatering is the most common reason for mold and root rot in home setups. Check the soil surface before misting — if it is still visibly moist from the previous watering, skip it. Bottom watering, where you pour water into a tray beneath the container, reduces the risk of fungal problems on the soil surface.
When are microgreens ready to harvest?
Harvest when the microgreens are 2 to 4 inches tall and the cotyledon leaves are fully open. For radish and broccoli, that is typically 5 to 7 days after sowing. Cut with clean scissors just above the soil line. Rinse before eating. Do not let them grow past the first true leaves, as flavor and texture decline after that point.
Can you regrow microgreens after cutting?
No. Microgreens do not regrow after harvest. Once cut, the roots and soil should be composted and the container washed before starting a new batch. To keep a continuous supply, stagger new plantings every 3 to 5 days. Two or three containers on a rotating schedule produce a steady harvest without large gaps between cuts.
Wrap-up: Growing Microgreens at Home
You can grow microgreens year-round without outdoor space or even a balcony.
City dwelling doesn’t always lend itself to planting, seeding, and harvesting, and microgreens are never going to fill you up.
But when it comes to flavor, health, and nutritional value, they can liven up just about any dish.
You can store your microgreens in the fridge for up to a week. Although, I just grow and harvest as I need.
Compost the soil (with red worms) and recycle it too.
But if growing microgreens is not for you, you can find ready-to-eat microgreens at your local upscale supermarket or farmer’s market.
Ready To Find Out?
9 questions. You'll know exactly where your space, seeds, and routine stand
before you waste a single tray. Most growers skip this and learn the hard way.
Further Reading
Teng, Z., Luo, Y., Pearlstein, D. J., Wheeler, R. M., Johnson, C. M., Wang, Q., & Fonseca, J. M. (2023). Microgreens for home, commercial, and space farming: A comprehensive update of the most recent developments. Annual Review of Food Science and Technology, 14, 539–562. https://doi.org/10.1146/annurev-food-060721-024636
Riggio, G. M., Wang, Q., Kniel, K. E., & Gibson, K. E. (2019). Microgreens — A review of food safety considerations along the farm to fork continuum. International Journal of Food Microbiology, 290, 76–85. https://doi.org/10.1016/j.ijfoodmicro.2018.09.027
Bhaswant, M., Shanmugam, D. K., Miyazawa, T., Abe, C., & Miyazawa, T. (2023). Microgreens — A comprehensive review of bioactive molecules and health benefits. Molecules, 28(2), 867. https://doi.org/10.3390/molecules28020867
Weber, C. F. (2017). Broccoli Microgreens: A Mineral-Rich Crop That Can Diversify Food Systems. Frontiers in Nutrition, 4. https://doi.org/10.3389/fnut.2017.00007