Lately, I have noticed we throw away leftover microgreens, even after putting them in the fridge. Yesterday I asked my wife, “how can we preserve our microgreens longer than a week?”
She answered, “why don’t we try dehydrating microgreens? My mom used to dry herbs and flowers back in the old country. I’m sure there has to be new technology.”
I spent some time taking with my mother-in-law and doing some reading and research.
Dehydrating microgreens is a great way of preserving them, either whole or as a powder, and you can serve them as garnishes on main entrees like stews, spices in soups or egg dishes, sprinkled on salads, pasta, or sauces, and you can add them to juices for an extra bit of nutrition.
And how do you dehydrate microgreens? I found a few different ways to do it. But, I believe electric dehydration is the easiest, most effective, and most economical home method for dehydrating microgreens. It preserves their nutrients, prolongs shelf life, and inspires microgreens recipe ideas.
In this post, you’ll find everything you need to successfully dehydrate and preserve your microgreens and even get some excellent recipes too.
Quick Reads
Different methods of dehydrating microgreens
Why is electric dehydration best?
Video: How to dehydrate microgreens using an electric dehydrator
Preserving your dehydrated microgreens
Want more information on Microgreens?
Are you too busy to read right now? Download the PDF of this post ==> DOWNLOAD PDF
Why dehydrate microgreens?
Most fresh microgreens last between 5-8 days after you grow and harvest them or if you bought them at a store. Some varieties can last 10-14 days with cautious handling. Read more here: How long can you store microgreens at home?
Dehydration is the fastest, easiest, oldest, and least expensive way to make food last longer without refrigeration.
Why you ask. Just like dried herbs, you can use them as “spices,” take them anywhere – camping, hiking, backpacking – and share them with grandma.
There’s also something captivating about the aroma of dried herbs and spices, and that includes microgreens. The process intensifies their flavors, but it also unlocks hidden elements such as the spicy flavor of roasted microgreens radish.
Dehydration adds no flavors and removes a few nutrients from the food being dehydrated. Dehydrating also keeps 95-97% of the original food’s nutrients as per the US Food and Drug Administration (FDA)
- Magnesium, potassium, sodium, or other minerals intact
- Neither are carbohydrate and fiber content
- Calories content is unchanged
- it does not affect vitamin A
- There is some loss of vitamin C
What is Dehydration?
Dehydration removes moisture from food, allowing the safe storage of dried food for later use.
Dehydrating decreases the moisture content of the microgreens to between 5 and 20%. Food bacteria can’t survive in that span, and the microgreens won’t get that dark, smelly, and slimy feel. They last longer and still taste delicious.

Different methods of dehydrating microgreens
There are several ways to dehydrate your microgreens, it turns out.[i]
Air Drying | Convection Drying | Heating (Oven) | Solar Dehydrator | Freeze Drying | Microwave-vacuum Drying
Air Drying
Air-drying has some advantages over oven preservation methods but takes longer to dry. When you air-dry your microgreens, they also take up less space, time, and energy than freezing or canning.
Air drying microgreens removes moisture, which inhibits the growth of micro-organisms that cause spoilage.
This method requires three factors; Heat, air circulation, and humidity.
Less humid and warm environments promote fast air drying. With proper air circulation, the microgreens will dry faster.
The larger the surface area you expose to moving air, the faster and more effective the air-drying process. If you dry indoors, you will need a fan.
Note: Don’t use aluminum screening for air drying foods. Aluminum causes discoloration of the foods.
Convective Drying
This is the most popular way of warm air drying. Convective drying works by circulating large flows of hot, dry gases from combustion heaters or air heaters over your microgreens that dries up the moisture.
While drying your microgreens, pay extra attention because the microgreens will be in direct contact with high temperatures.
Convective drying[ii] is excellent for drying large amounts of microgreens because it is cost effective.
Using the convective drying method to dehydrate microgreens has become a common practice among many farmers.[iii]
When you want to dehydrate small to medium quantities, you can use your convection oven, an electric oven with a fan at the back in place of a metal coil at the bottom.
Heating (Oven)
You can use an oven to dehydrate microgreens if you intend to dehydrate only a small or medium batch of microgreens.
One advantage of an oven is that the temperatures are higher than a food dehydrator. Your microgreens will dry up faster. But higher temperatures can damage the nutritional value of the microgreens. At 140°F (60°C), it will take 30-50% longer to dry microgreens in your kitchen oven.
See How to dehydrate microgreens using an electric dehydrator for further instructions.
Solar Dehydrator
For centuries, farmers sun-dried their farm produce to preserve for rainy days. With the improvement in technology, microgreens farmers use solar dehydrators to preserve excess produce for optimal profit.
Solar dehydrators are alternatives to electric dehydrators. A solar dehydrator uses the sun’s natural heat alongside airflow to remove moisture from vegetables and foods. It is relatively cheaper to use and maintain, unlike an electric dehydrator. Still, it is significantly more expensive to purchase or build.
Depending on the sun’s intensity and the solar dehydrator’s size, it takes a minimum of two days to achieve dryness.
See How to dehydrate microgreens using an electric dehydrator for further instructions.
Note: If you’re an urban farmer or backyard gardener and thinking of building your own solar dehydrator, here’s a neat video with instructions.
Freeze Drying
I tried freeze-drying, but it is not my best option. Dried microgreens weigh less, keep most of their flavor and nutrients, and they last longer. Freeze drying microgreens requires you to be extra careful.
To keep the color, flavor, and nutrients of the microgreens, you will want to blanch them. Place them in boiling water for only three minutes to prevent cooking.
Immediately after blanching, put the microgreens inside cold water and rinse.
If you skip the blanching process, wash your microgreens to remove any form of dirt. Air dry or pat dry to remove excess moisture. This will help prevent ice crystals that can defrost and cause mold.
Pre-freeze the microgreens for about 30 minutes or an hour by placing them on a parchment paper or a tray. Avoid overlapping them if possible, as this will prevent them from sticking together. After an hour, remove them and preserve the dry microgreens in an airtight freezer bag or container. If you follow the procedures correctly, they can last up to 6 months or a year.
Microwave-vacuum Drying
Microwave-vacuum drying is a new form of microwave energy application equipment that combines the power of microwave and vacuum drying.
It uses the microwaves that reach the microgreens, causing the moisture to evaporate. The excess humidity leaves by air currents, leaving uniformly dried leaves inside the dehydrator.
This method’s advantages include higher efficiency, energy-saving, high drying rate, and uniform heat transfer.
Why is electric dehydration best?
Electric dehydrators are kitchen appliances with a heat source, a ventilation system, and trays to place the food on.
They circulate dry heat around the microgreens. [iv] However, the temperature of the heat is not high enough to cook them. In this way, they preserve the microgreens for extended periods without fear of spoiling.
- Unlike freeze-drying microgreens (and blanching), you don’t have to rehydrate them for use and don’t have to worry about spoilage.
- Dehydrated microgreens are long-lasting. You can use them as-is and more cost-efficiently.
- Electric dehydration takes hours compared to days with air drying.
- Dehydrated foods lose only about 3-5% of their nutrients than frozen foods, which lose 40-50%.[v]
- Dehydrated foods weigh 60-90% less than other drying methods.
Electric dehydrators don’t depend on the weather. They maintain low temperatures and use less energy than an oven.
How to dehydrate microgreens using an electric dehydrator
Before you buy an electric dehydrator, try drying a few microgreens varieties (arugula, spinach) in your convection or regular oven. You will get the ins and out of the process and identify the appliance features you want.
Selecting an electric dehydrator
Commercial electric dehydrators are expensive. – upwards of $2,000. However, the improvements in technology have reduced the price of home electric dehydrators to under $100.
In my upcoming article, I will review the latest and best for you. For now, most of these are the key things to look for:
- Compact Space requirements
- Heat control to 160 F
- Airflow with 250 watts
- 4-6 trays
- A sealed door
- A sturdy, non-aluminum cabinet
- Safety certified
- Service and warranty of one year
- Capacity (10 liters | quarts)
Click to see my recommended Electric Food Dehydrating Machine

Drying microgreens with an electric dehydrator
Here is your “recipe” for drying microgreens with your new electric dehydrator.
Equipment
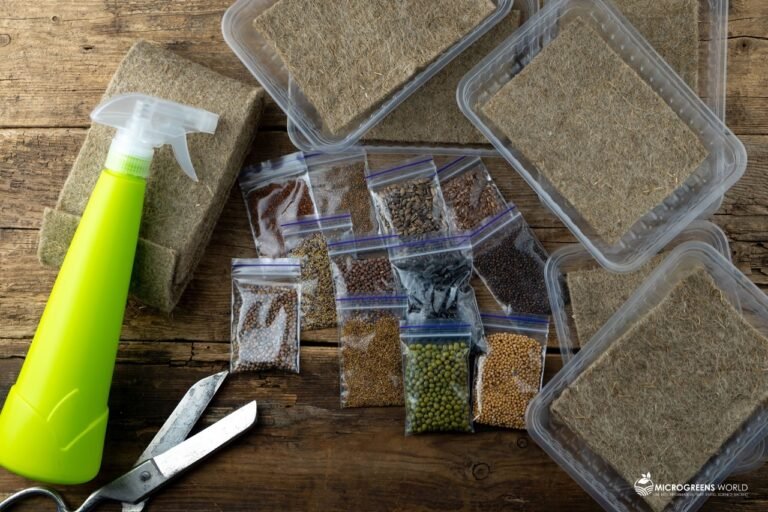
You may need a few “tools” to get started:
- Paring knife (stainless steel blade), if you choose to not dry the stems
- A large cutting board
- Paper towels or salad spinner
- Glass, ceramic, or rigid plastic storage containers
- A steamer and basket, or kettle and collapsible steamer (if you blanch)
- Small stick-on labels to label your jars
- A pencil and notebook to track times and recipes
Ingredients
Spinach and arugula microgreens are good first candidates to try your hand at dehydration.
I would start with a small batch of microgreens to start – about half a pound or two 4-ounce boxes.
Preheat Dehydrator
If you eat them raw, you need not blanch them before drying. However, some microgreens, like pea shoot microgreens, have thicker and more fibrous stems. So, you can blanch, or you can cut off the stems.
While you prepare your microgreens, preheat your electric dehydrator between 92ºF and 118ºF (33°C and 48°C). Though controversial among “purists,” in this range, your microgreens are still raw. I chose the middle of those two temperatures – 110°F (43°C) to be the best time for me.
Your electric dehydrator keeps the temperature in the drying chamber at a computer-controlled constant.
You will want to experiment or use the “herbs setting” in your dehydrator instruction manual. The lower the temperature, the longer is the drying time.
Note: It’s a good idea to have ventilation in the area you are dehydrating. Heat at 110°F (43°C) for three hours spreads. I open my kitchen window.
Instructions
- Wash and clean your microgreens.
- Dry the microgreens using paper towels or your salad spinner. Read how-to HERE.
- If you don’t want to dehydrate the stems, then cut them off (not recommended)
- Spread the microgreens out on a dehydratortray (or baking sheet if using the oven).
- Place the microgreens in a single layer on dehydrator trays.
- Check periodically.
- Drying time can vary from two to four hours.
- Microgreens are dry when they crumble and stems break when bent. If you’re in doubt, dry until you’re sure.
- Notice that the microgreens have shrunk about 25-35% in volume.
- Follow the manufacturer’s instructions for “herbs.” Once the process completes, allow the food to cool.
Video: Watch The Fit Farmer – Mike Dickson on How to use and preserve MICROGREENS!!
That’s it! Well, almost.
Preserving your dehydrated microgreens
There’s one last step that the pros call “conditioning.” This is where you’re going to test that your dehydrated microgreens are free of all moisture.
- Place the microgreens in a quart-size (freezer) plastic bag.
- Leave them in the bag for 8-10 hours.
- Open and inspect the bag for any moisture.
- If you find any moisture, put them back in the electric dehydrator
- Repeat until satisfied.
Once dehydration is complete, store the microgreens in airtight glass containers in a cool, dark place, and label the jars.
And enjoy!
Check the container regularly for and bad microgreens that could contaminate the jar with mold.
Homemade Spinach Microgreens Powder
If you followed the dehydration steps above, take this additional step to preserve your microgreens.
Equipment
Mortar and pestle, coffee grinder, food processor, or spice mill
Ingredients
Completely dehydrated spinach or arugula microgreens
Instructions
- Once the microgreensare dry, place in a food processor, coffee grinder, or other equipment.
- Grind until the microgreens reach your desired consistency.
- Process until you have a fine powder.
- Store in an airtight glass container
- Label the container if you haven’t done so already.
- And enjoy!
Note The vitamin content or dried foods declines. Don’t store longer than 9 months.
Check the container daily for the first week. Shake the container so that the powder doesn’t stick together, and it will distribute any moisture to prevent molding.

Jamaican Curried Lentil and Radish Microgreens Soup with Coconut
This curry lentil soup is easy to cook and great as a main dish for vegetarians and non-vegetarians. Add the spicy flavor of radish, coconut, and ginger, and it is your tasty lunch-time favorite.
- Total Time: 60 minutes
- Yield: 4 Servings 1x
Ingredients
- 2 oz dehydrated radish microgreens (or microgreens powder)
- 1 medium-sized onion
- 2 cloves garlic
- 2 slices peeled root ginger
- 1 small red pepper
- 1 small green pepper
- 2 tbsp olive oil
- 1 tsp ground cumin
- 1 tsp garam masala
- 2 oz 55g creamed coconut
- 1 3/4 pint vegetable stock
- 4 oz split red lentils
- 1 scotch bonnet pepper
- * freshly ground black pepper (to taste)
- 2 tsp ground coriander
Instructions
- Wash and dry the lentils.
- Peel the cloves of garlic.
- Combine the slices of ginger and garlic and crush with the pestle and mortar.
- Add water and make a thick paste.
- Peel the onion and chop finely.
- Slice the sweet peppers into ¼ inch strips.
- Heat the olive oil in the saucepan.
- Slowly add the chopped onion and fry on medium heat until transparent.
- Add the garlic and ginger paste.
- Heat for 2 minutes before adding the spices.
- Cook for another minute, then stir in the sweet peppers.
- Add the creamed coconut to the pan.
- Stir until it becomes a thick sauce.
- Add the vegetable stock, lentils, scotch bonnet pepper, and black pepper.
- Simmer the soup for 30 minutes.
- Add the dehydrated microgreens and cook for 5-10 more minutes.
- Turn off the fire and stir, being careful to avoid crushing the scotch bonnet.
- Remove the scotch bonnet before serving.
- Prep Time: 20 minutes
- Cook Time: 40 minutes
- Category: Lunch
- Method: Simmering
- Cuisine: Caribbean
- Diet: Vegetarian
Want more information on Microgreens?
Microgreens have a short shelf life that ranges from 5 to 14 days. To prolong the shelf life of your microgreens, you need to preserve them properly. Choosing any of the described preservation techniques will go a long way in preventing your products from going to waste.
I believe electric dehydration is the most effective and economical home method for drying microgreens. It preserves their nutrients, prolongs shelf life, and inspires microgreens recipe ideas.
Start incorporating the health benefits of microgreens into your nutrition.
I’ve learned a lot about microgreens, how good they are for you, and what you can do with them. Check out my guide, “The Beginner’s Nutritional Guide to Incredible Microgreens.”
[i] Bissett, B. (2018, April). A Beginner’s Guide to Dehydrating Food. Retrieved October 16, 2020, from https://learn.eartheasy.com/guides/a-beginners-guide-to-dehydrating-food/
[ii] Shahab, A., Wen, P., & Richard, G. (2009). Convection drying process modeling and simulation study based on tomato. Faculty of Engineering and Surveying, University of Southern Queensland. Retrieved October 16, 2020, from https://www.researchgate.net/publication/272493907_Convection_drying_process_modeling_and_simulation_study_based_on_tomato
[iii] Mills-Gray, S. (2018, May). Introducing Food Dehydration. Retrieved October 16, 2020, from https://extension.missouri.edu/gh1562
[iv] Wyatt, M., Wilson, H., Suzuki, A., & Hongu, N. (2019, December 10). Home Food Preservation: Drying Vegetables. Retrieved October 16, 2020, from https://extension.arizona.edu/pubs/home-food-preservation-drying-vegetables
[v] Home. (n.d.). Retrieved October 17, 2020, from https://foodassets.com/info/dehydrated-food-versus.html.
[vi] “So Easy to Preserve”, 6th ed. 2014. Bulletin 989, Cooperative Extension Service, The University of Georgia, Athens. Revised by Elizabeth L. Andress. Ph.D. and Judy A. Harrison, Ph.D., Extension Foods Specialists.